
The Mac Mail app is one of those apps that we use every day, and with that we tend to think we know everything we need to know. Turns out there are several super-helpful, time-saving features a little under the surface. Here are five of Mac Mail’s hidden features.
Five hidden features in the Mac Mail app
1. The Sender Menu
So, you get an email, and what can you do beside read it, or reply to it, or file it, or throw it away? That’s all, right?
Wrong.
Look for the tiny downward-point chevron at the far right of the sender’s name.

When you click right there on that chevron you’ll get a menu, like this:

Note: you have to hit that chevron pretty much right on the button. If you just click on the name you won’t get the menu.
Every item in the menu is interesting and useful. I particularly like New Email (way, way better than Replying when your new message has nothing to do with the old one), Add to Contacts (such a time saver!) and Search for (it saves you the trouble of doing a search manually).
2. Keyboard shortcuts
Learn a few keyboard shortcuts and save precious seconds every time you use them. My three favorites:
⌘-Shift-D instead of clicking “Send”
The keyboard shortcut for Send is ⌘-Shift-D, right there in the Message menu but since we almost always click the paper airplane button to send our messages, we don’t know about the keyboard shortcut. Now we do. After addressing and composing your email, use ⌘-Shift-D to send it.

⌘-Shift-U to Mark as Unread
The Mail app shows a blue dot next to unread messages, indicating to your which ones you’ve yet to read. It’s a quick way to visually sort your emails into the ones you haven’t read and the ones you’ve already read.
Sometimes you’ve had a look at a message and you want to remember to have another look later. In that case, it would be nice to put the blue dot back. It’s easy to do– it’s Mark as Unread in the Message menu– but it’s even easier when you simply press ⌘-Shift-U.
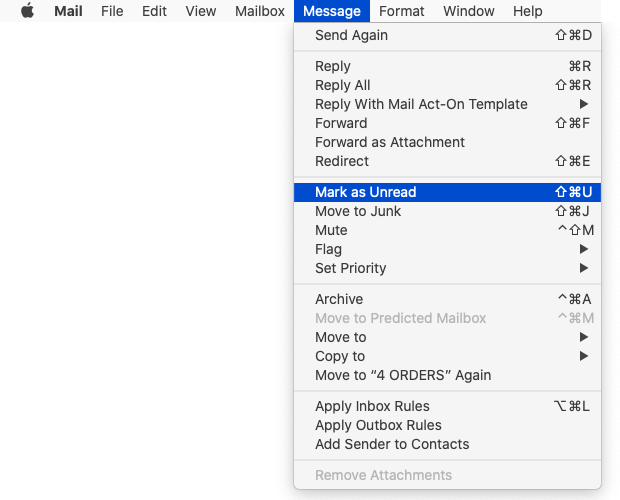
Note: use ⌘-Shift-U a second time to turn the blue dot off.
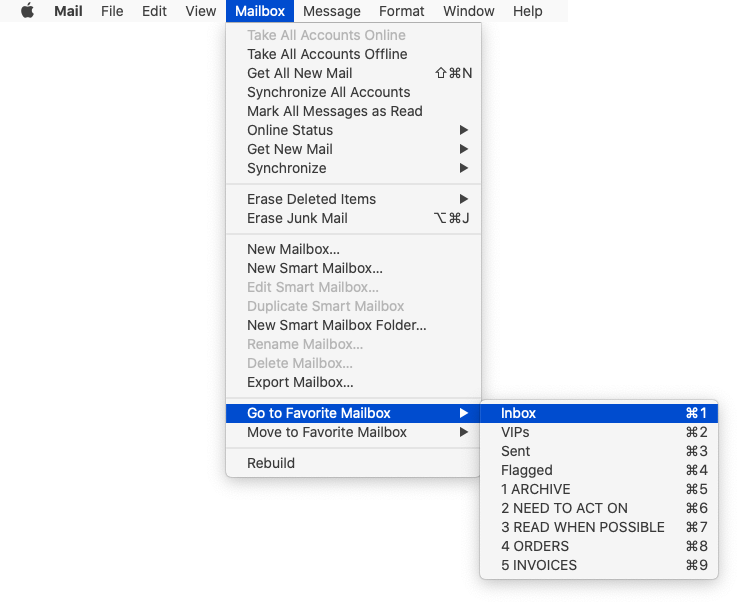
⌘-1 to go to the Inbox
We’re always moving around in Mail, mostly in the Inbox but sometimes looking in Sent, or VIP, or some favorite folder. You can get back to the Inbox with ⌘-1. And, as a bonus, the VIP mailbox is ⌘-2, Sent is ⌘-3, and Flagged is ⌘-4. ⌘-5 through ⌘-9 are the first five mailboxes that you’ve made, over in the sidebar.
3. Open a New Viewer Window
Suppose you’ve done a search in Mail, and you want to work with the results of that search, but you also want to check your other emails. This is easily accomplished: just open a New Viewer Window.
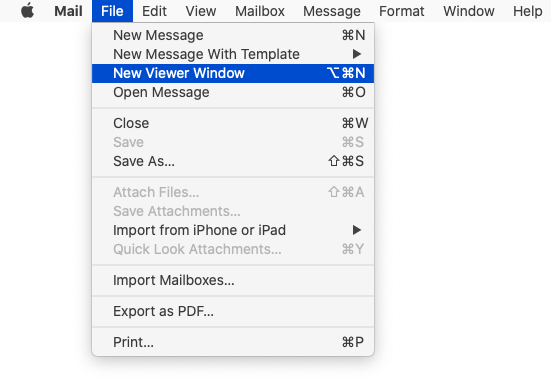
The result is shown below.

4. Save a Search
Now let’s say you’ve done a search, and you know you’ll be making this search again someday. Rather than trying to remember how you did the search the first time just let Mail “save” your search so you can do it again with a click. Here’s how it works.
Here I’ve done a search in Mail for every message with the word “applescript” in it.

See that tiny “Save” button (arrow is pointing to it)? If you click it, you get something like this:
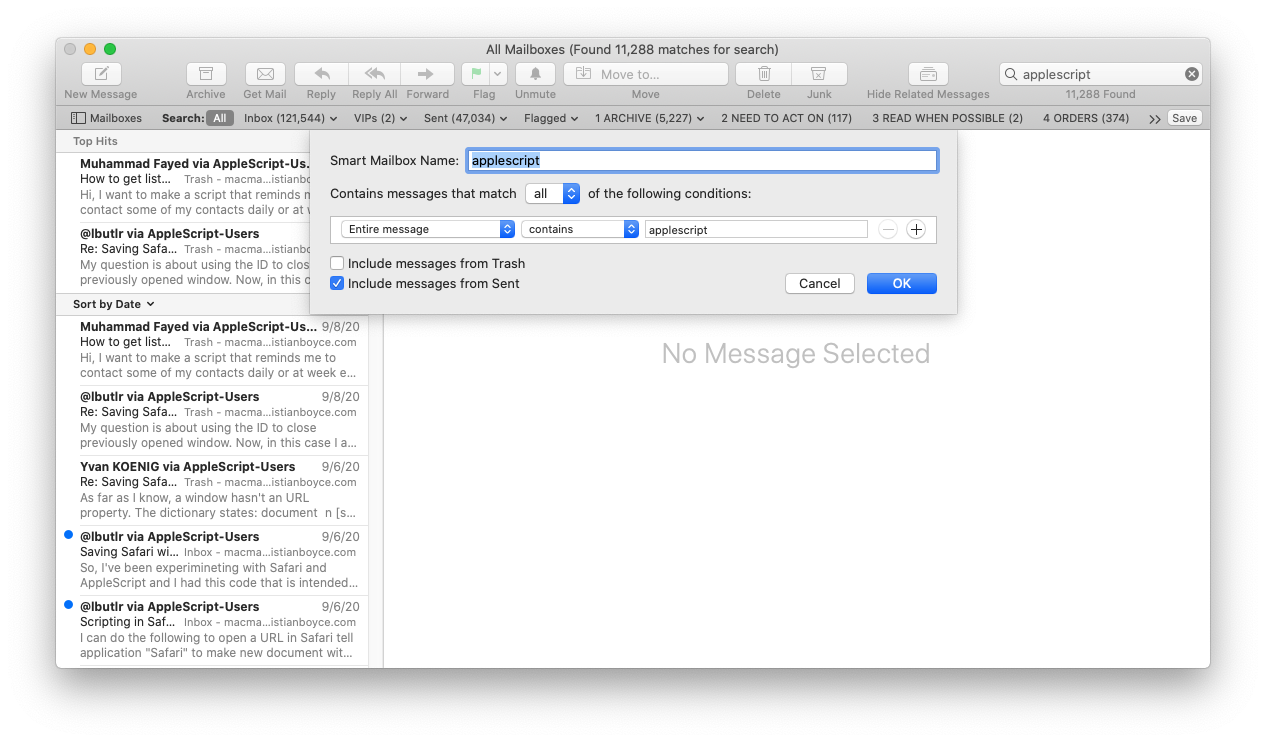
You can make adjustments in that box if you’d like (in particular you might want to change the name). Then click OK. The search will be saved as a “Smart Mailbox” in Mail’s sidebar.

The great thing about these Smart Mailboxes is all you have to do is click, and the search is performed again. This is way better than making a folder (or mailbox) and dragging things into it: firstly, it’s easier and faster, and secondly, it leaves the messages in place, so if your search finds messages that are in the Inbox, and in Sent, and in some other folder, they’ll stay there– but they’ll be presented all together, in one list.
(My other Smart Mailbox is one that captures every message that is from one of my family members. They’ll still be in my Inbox, but if I want to see, very quickly, all messages from all of my family members, all I have to do is click on my Smart Mailbox called “Family.”
In practice you won’t need a lot of Smart Mailboxes, but if you make a couple of them you will save a ton of time.
5. Redirect instead of Forward
Sometimes you receive an email and you want someone else to see it. Most of us “forward” the message, and most of the time that’s fine.
The problem is that a forwarded message gets those blue lines down the side, so the person you forward it to doesn’t get the same visual experience you did.
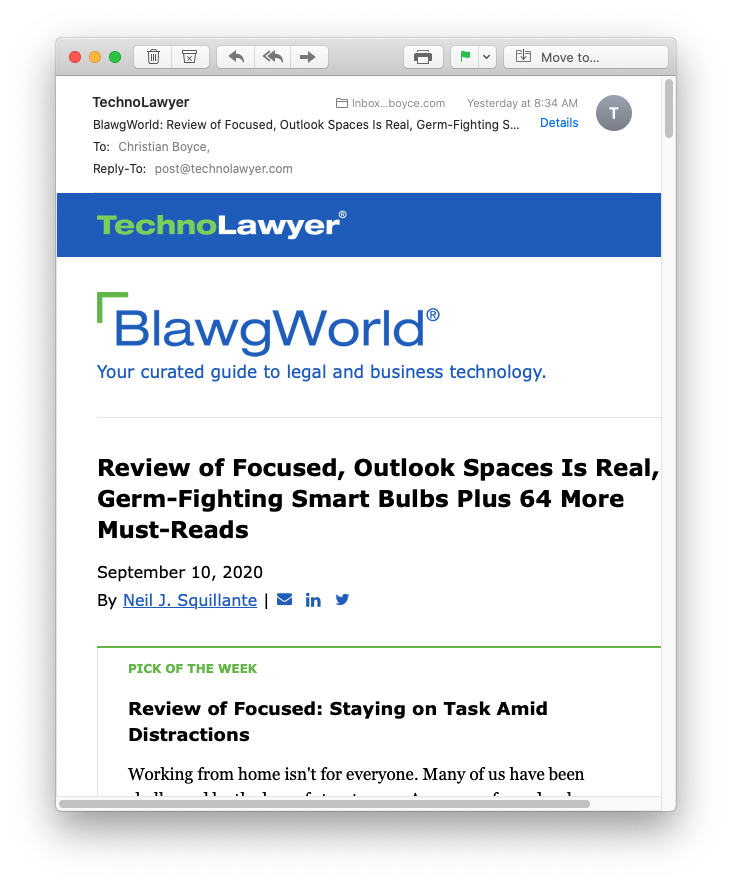
For example, here’s a newsletter, very nicely formatted.
If I click the Forward button, or go to Forward in the Message menu, I get this:

If you want your recipient to get a nice clean message, without the blue bar down the side or the extra stuff at the top, you should redirect the message instead.
Redirecting is easy: just go to the Message menu and choose Redirect. The result is shown below.
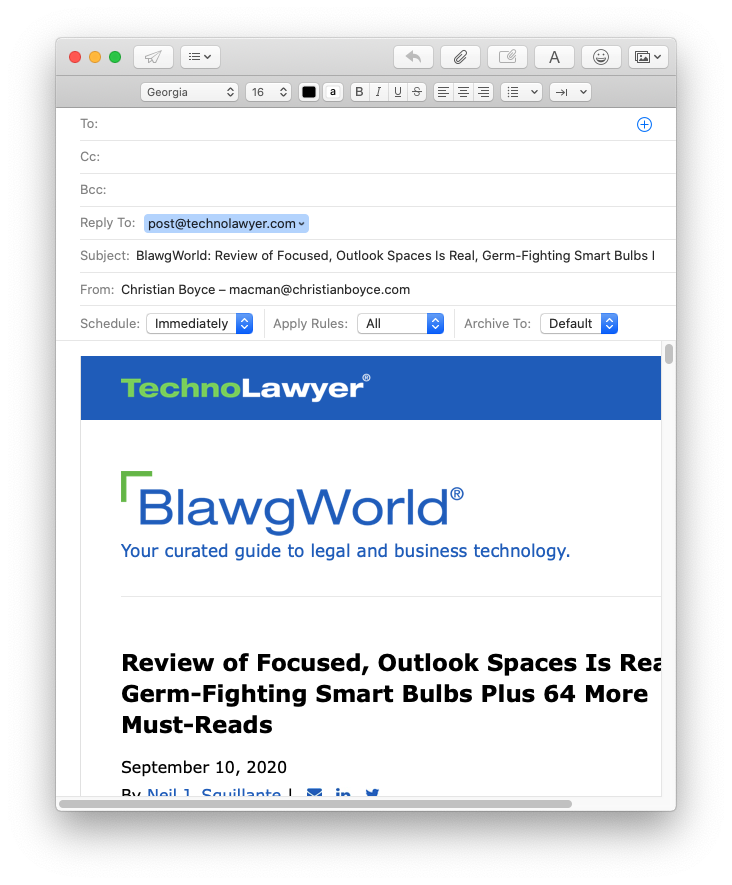
The redirected message looks just like the original. The recipient will know it came from you because it will say “Resent from (your name)” but otherwise it looks just like the original. Replies will go to the original sender, not to you, so be aware of that.
In many cases a redirect will be exactly the right thing to do.
You can add a Redirect button to the Toolbar too– here’s how.

Looking for iOS Mail tips? See My Ten Best Tips for iOS Mail: Shortcuts, Swipes, and Taps.
Did this article help you?
Maybe you'd like to contribute to theChristian Boyce coffee fund.

Want some some quick iPhone how-tos?
Visit me at iPhoneinaminute.com.
Looking for in-depth tutorials?
See my christianboyce.com website!

Leave a Reply